To make the digipak I used Photoshop, which is fairly easy to use once you've had experience using the program. I chose to use Photoshop as it has sophisticated tools which enable to create professional and more complex images; that you wouldn't be able to create using other software programs.
The first image I edited was a Hainult image which we are going to se for the CD panel; the editing for this image was simple as I just changed the image to black and white, increased the contrast and added dark mid-tones.
Then I selected one of the guitar photos, which I took when taking pictures of the props, and edited that image. I duplicated the image, making one black and white and leaving the duplicate in colour. Only making the black and white copy visible, I then used the magnetic lasso tool to outline the guitar, once that I did that I then cut the guitar out of the image and made the colour copy visible.
The outcome was that everything in the picture was in black and white except the guitar which is bright blue - making the guitar the focus of the image.
Then Ellie suggested that we should add some writing on the wall of the image to make it look like some of the lyrics were written on the wall. To do this I simply used the text tool and typed the chorus lyrics, afterwards I adjusted the font size, style and the position of the text.
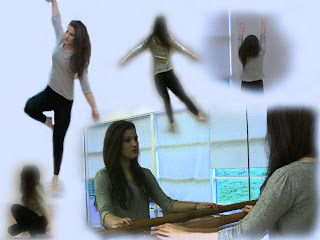
Dance studio collage
I chose a light blue background for the image. I opened the picture of Ellie elevated then used the magnetic lasso tool to cut her out of that image and paste it onto the blue background. After doing that I used the eraser tool to get erase any objects or background from the silhouette. Once everything was done I resized the image and placed it to the top-left.


No comments:
Post a Comment